 |
Ok let’s start!
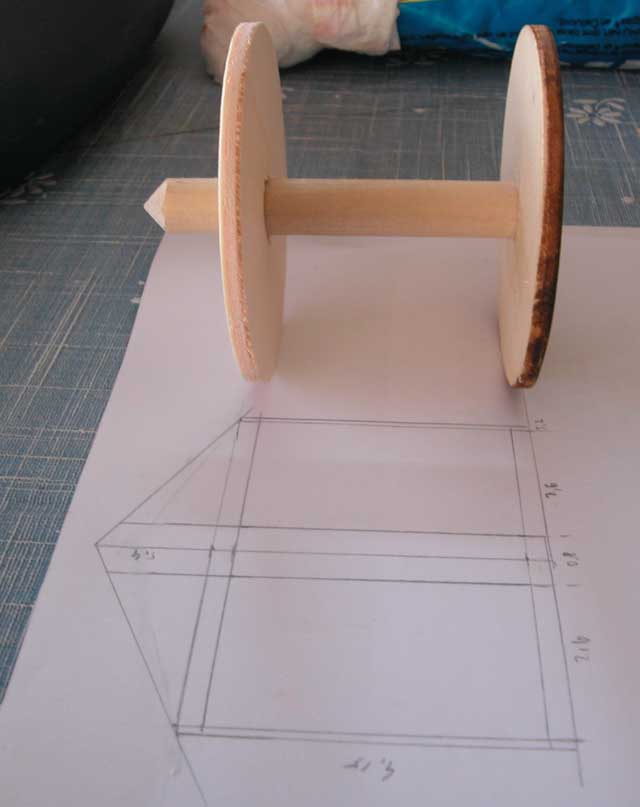
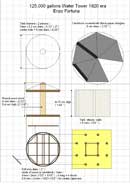
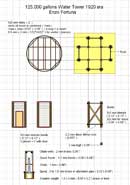
First, take a look at drawings. I’ve try to include here any detail about materials and a “decent” conversion from millimetres to inches.
I’ve try to use the standard American size for bents using the Northeastern Scale Lumber Company price list on their web site : http://www.northeasternscalelumber.com/
download price list at : http://www.northeasternscalelumber.com/pdf/NESL_Price_List_2005.pdf
Here is a “Conversion Chart” with big approximation but usefull
(Approximate 1" = 1' equivalents)
Full Size |
Fractional |
Decimal |
Metric |
1/4" |
1/50" |
.20 |
.5 mm |
3/8" |
1/32" |
.31 |
.75 mm |
1/2" |
1/25" |
.040 |
1.0 mm |
3/4" |
1/16" |
.062 |
1.5 mm |
1" |
5/64" |
.80" |
2.0 mm |
1-1/2" |
1/8" |
.125 |
3.0 mm |
2" |
5/32" |
.156 |
4.0 mm |
3" |
1/4" |
.250 |
6.25 mm |
4" |
5/16" |
.312 |
8.0 mm |
6" |
1/2" |
.500 |
12.5 mm |
12" |
1" |
1.000 |
25.0 mm |
|
 |
Here is a part list ( just to have an idea how to spend your last 100 …. cents !
Don’t law, I’ve calculated it, more or less ! ) .
Water tank :
- 2x wood circles of about 2 or 3 mm. ( 1/12 “ ? ) thickness
- 5/16 round stock x 2 ¼ “ high for the inner post
1/32” thick wall material (soft wood to be scribed) 2” x 4” (Northeastern named it as scribed sheathing )
half of this is used for the walls of the pump room at the base
-
0,10” brass wire (peel 1’ of electric wire and use the single wires you find inside)
-
A little ball (2 mm or 1/12” diameter) for the lighting arrestor (plastic … look on your workbench and use your imagination here: I’ve found a perfect pin on my wife sewing bag)
-
a cardstocksheet (roof shape)
- a sheet of thin black paper (roof shingles)
-
the littlest chain you can find (1 mm node) try on a ship model shop?
-
Spout (you can find it as white metal detail or build it with a 3 mm diameter brass or aluminium pipe.
Bent frames and base pump house :
1/16” x 1/16” - 1/32” x 1/16” - 1/32” x 1/32”
You find it at 24" pieces ... so you leave material for another two water towers or better .. other projects!
0.15” metal (brass or iron) wire (better if rigid) for the bent rods
A little door ( you can build it on wood or buy a plastic detail from Grandt Line or others)
Base
( I always use a sheet of thin wood as base for any structure : this help me to position on the layout / diorama and re-use it in the future without damage):
1/2 mm thick birch sheet (I use the same material for “board on board” walls on other structures)
|
|
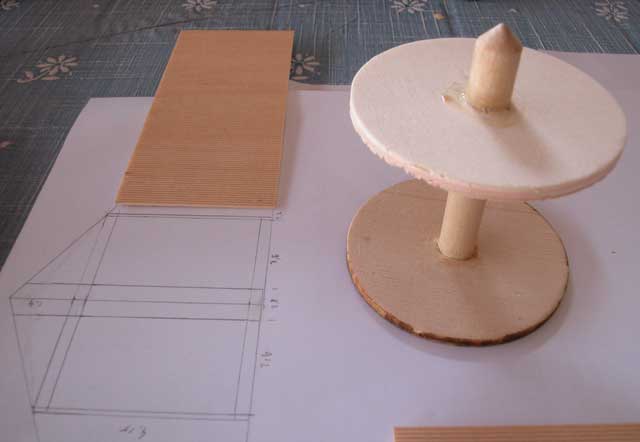
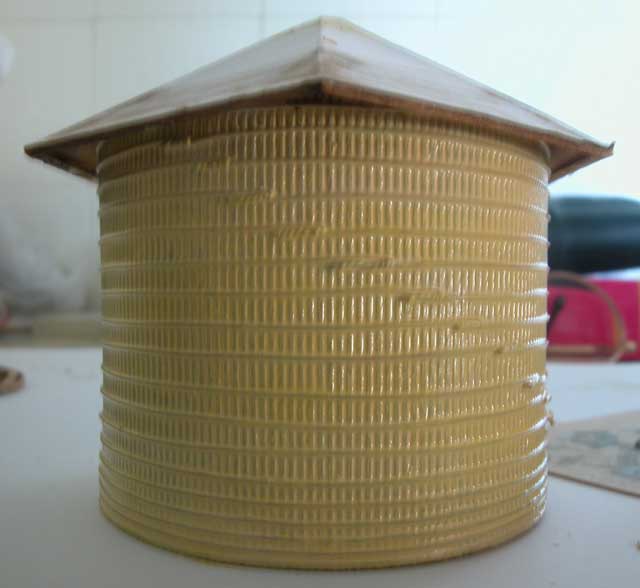
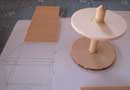
Cut the two circles and make a hole on each for the inner post. Position at the proper distance , glue it in place and shape with a file the top of the post
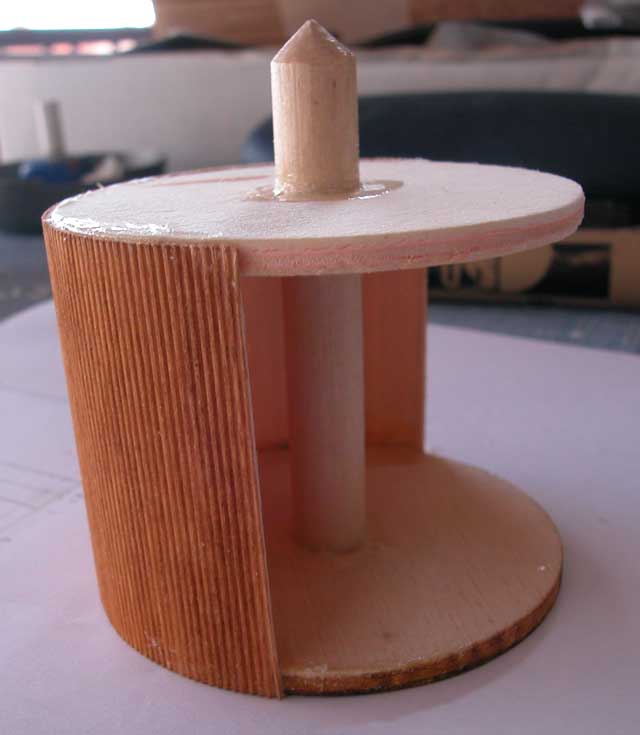
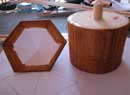
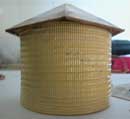
Cut the scribed sheathing at exact the high needed to cover the wood circles. I’ve make it round in two pieces : is simpler to exact fill the circle. For the material you choice: scribe with the “rear” of a cutter (don’t use the sharp edge! you will cut the wood!) at 1-2 mm with vertical lines to simulate boards …. Or just buy it at Northeastern! |
 |
 |
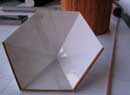
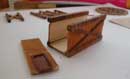
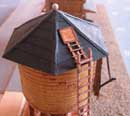
Prepare the roof base using a cardstock. If is white (like any cards) paint it brown with a felt-pen. Cut and glue on bottom side a 1x1 mm wood border. Remember : a new and sharp hobby knife blade will save you lot of patience for worsted phases
|
 |
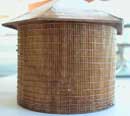 |
Using electric brass wire, wind it around the tank and twist together the end to tighten narrow the tank wall. Leave more or less 5 twist, cut the excess and turn parallel the wall. The band at bottom should be closer together than the top ones.
|
 |
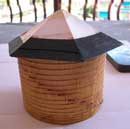 |
After all bands are in place, airbrush with a light brown-yellow, then, using a wood felt-pen ( alcohol based ) leave a little color to external part of wire, leave dry for a moment and , using a brush and just alcohol, melt the brown to leave only some “rust” on bands. If you are not satisfied of your job, just clear with more alcohol and repeat. Try to leave some vertical rust on walls too. After walls are finish, glue the cardstock roof. Cut strips of black paper for shingles and glue it starting from bottom, covering the previous one just a bit ... until the top. Then glue the vertical shingles (check drawing 1) and install the "lighting arrestor". |
 |
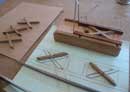 |
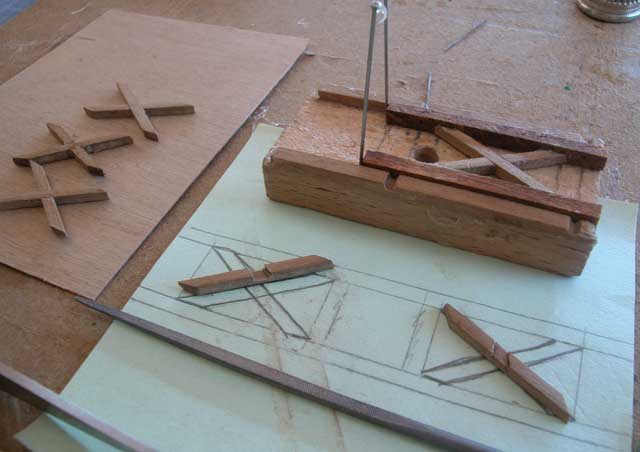
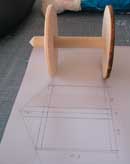
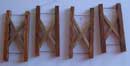
Prepare some jigs for repetitive parts ( is very difficult to make left and right sides that are equals, two stairs with same position for steps, and so on ... ) The time you spend on tools , you gain lather.
You don't need something complicated ... as you see : just a piece of wood , two square bents and some pins to guide and mark positions.
|
 |
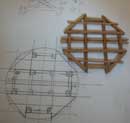 |
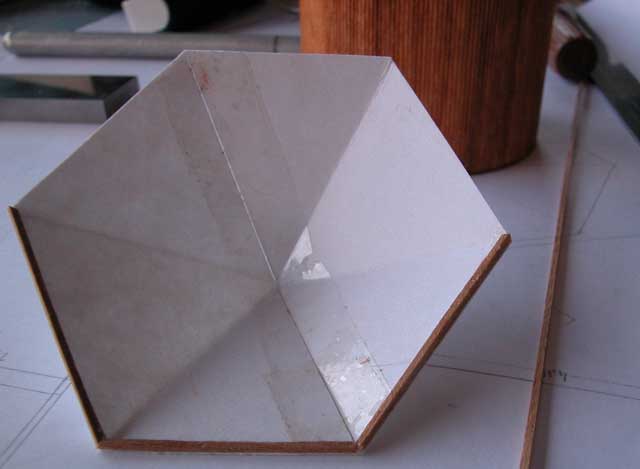
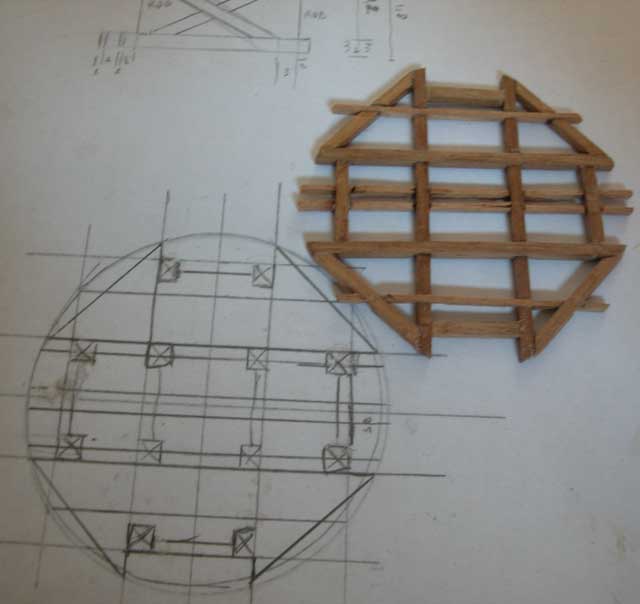
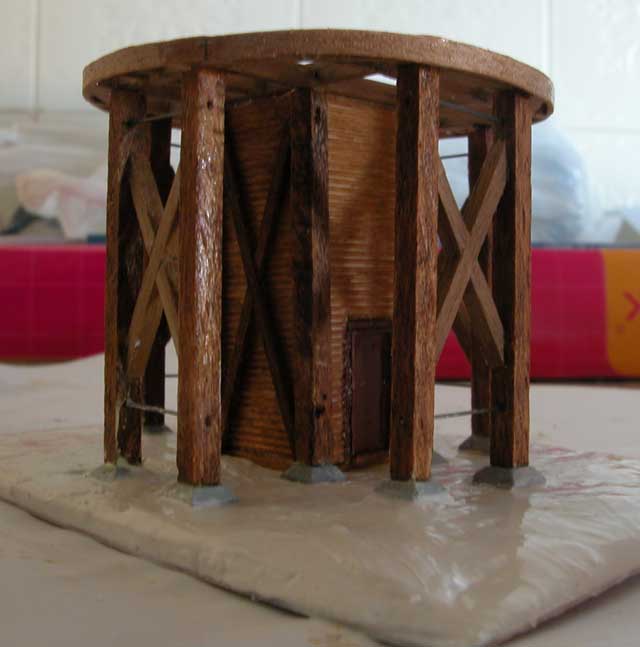
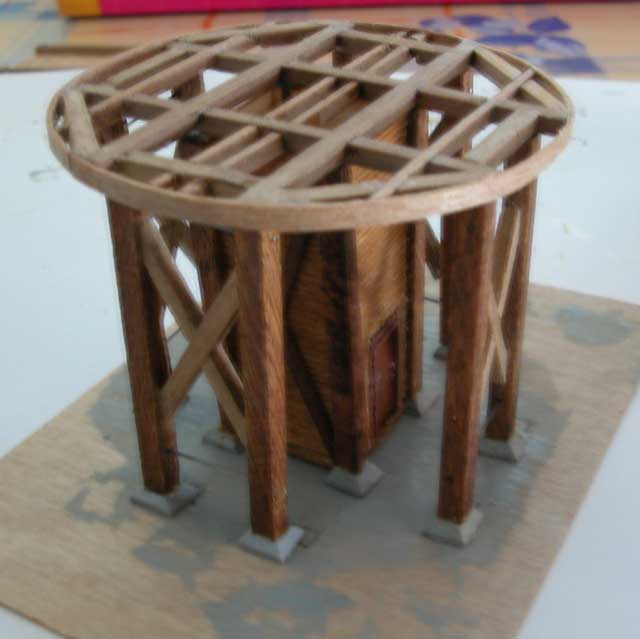
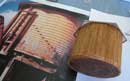
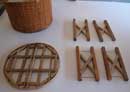
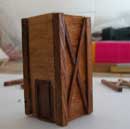
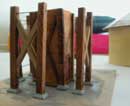
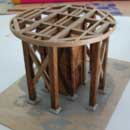
Ok, let me say that this part can be very “useless” and somebody can say “You are really crazy!” ….. BUT can add a prototypal feeling if you can view the model from down to up (it depends on your layout/diorama high). The “only” tedious job is to make appropriate cut on bents to cross each other ….. and make a circle of thin wood that replicates the bottom shape of the tank.
Check here down also other pictures ….. you will cover everything with the tank!
|
 |
 |
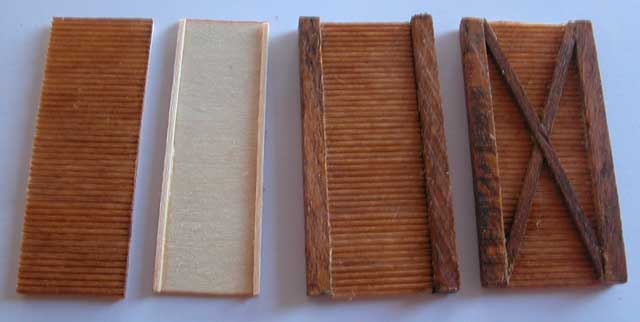
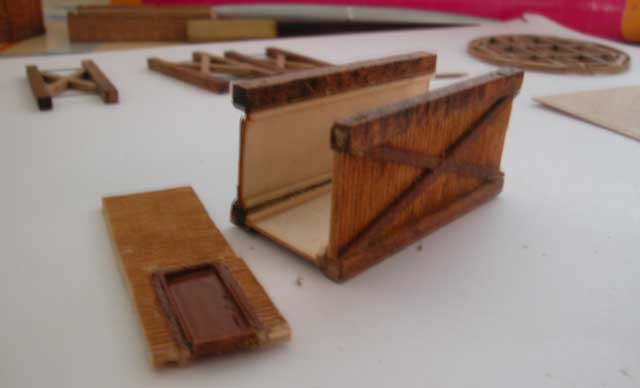
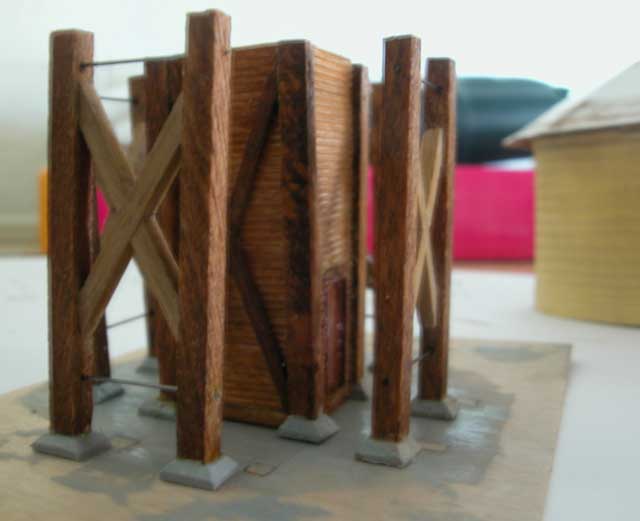
Preparing the base walls is relative simple, the main problem is to glue together at 90 degree. Use a metal square tool and strength internally with a square bent. At left is the sequence.
|
 |
 |
Door I used is a plastic detail from Grandt Line (I’ve a mixed part bag you can order. It contains lot of different window, doors and several other details … really nice moulders ).
|
 |
 |
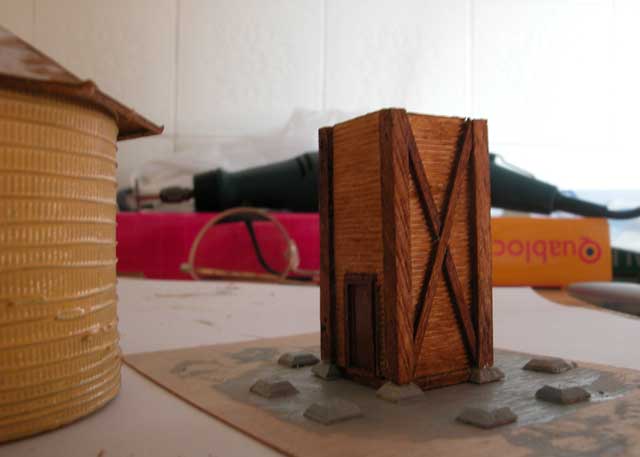
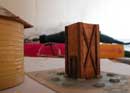
Prepare a base (I suggest a thin square piece of birch: is rigid, flexible and light..). I've cover the wood with a thin layer of white plaster.
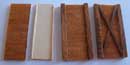
Using 2mm square wood pieces , file it at 45 degree to prepare the bents foundations.
Color it in “concrete” gray, glue in place (double check position using plan in the drawings and ... your real model !
|
 |
 |
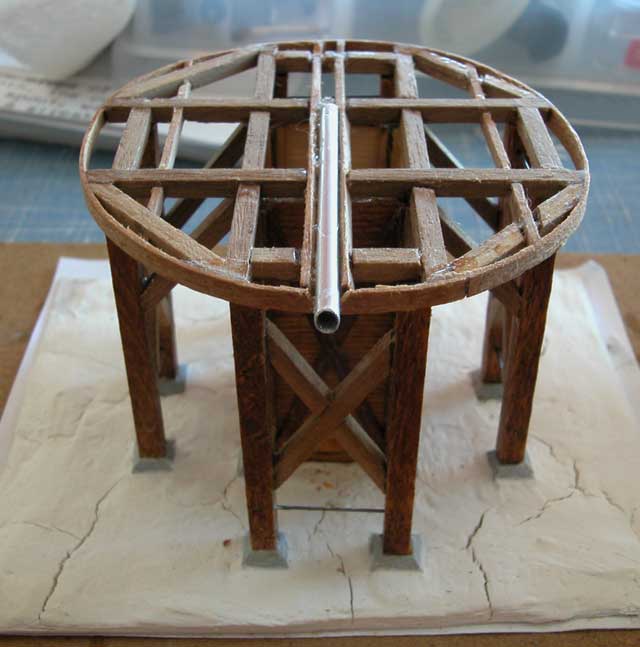
Any detail is related to the scale you work and to your "rivet counting feeling" . I've used a 2 mm diameter aluminium pipe glued as rigth picture for the water. And now ..... is time to cover this beatifull work with the tank !
|
 |
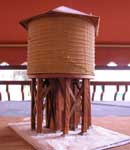 |
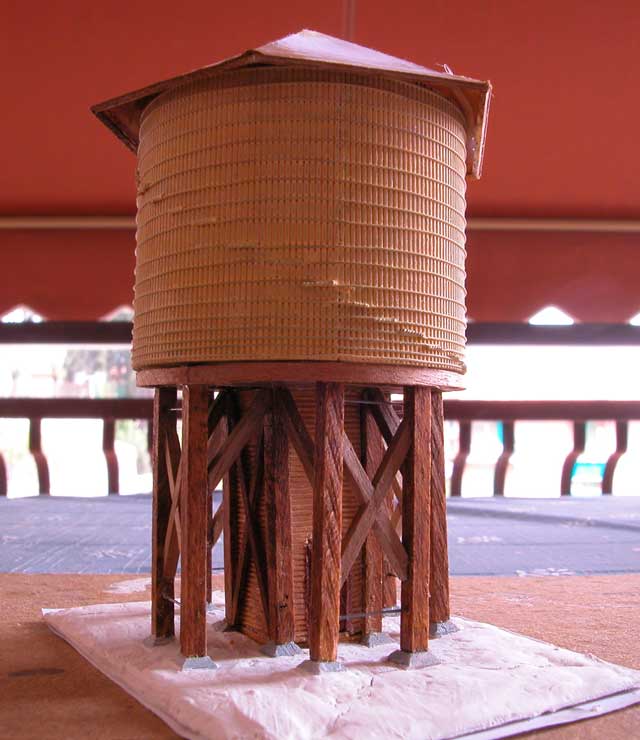
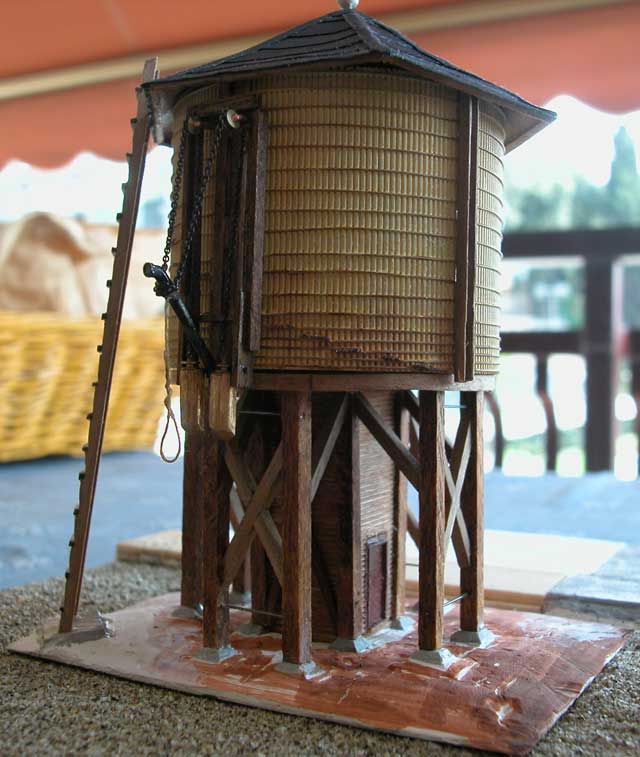
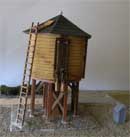
Tank is positioned and glued.
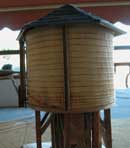
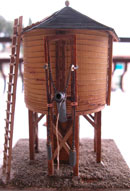
After preparing the spout frame separately (care to shape it in square) set in position on the water tank.
Water level is indicated by a "U" shaped piece on a side. Inside the "U" a iron level is free to slide up and down, following the internal water level.
Use a white paper with orizzontal marks and glue it inside the "U" tracks. |
 |
 |
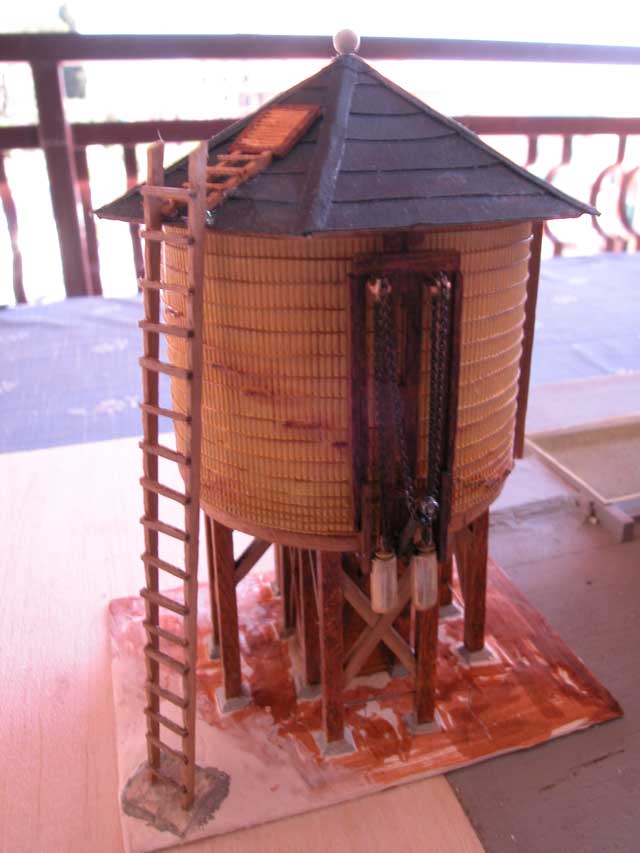
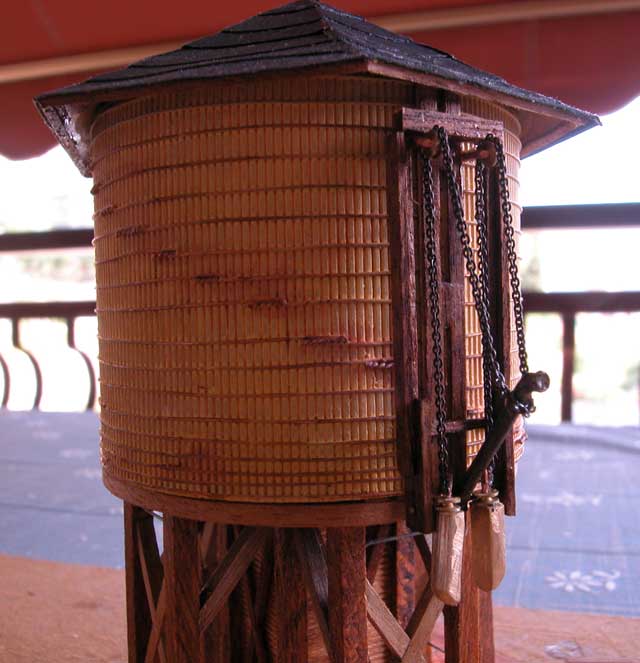
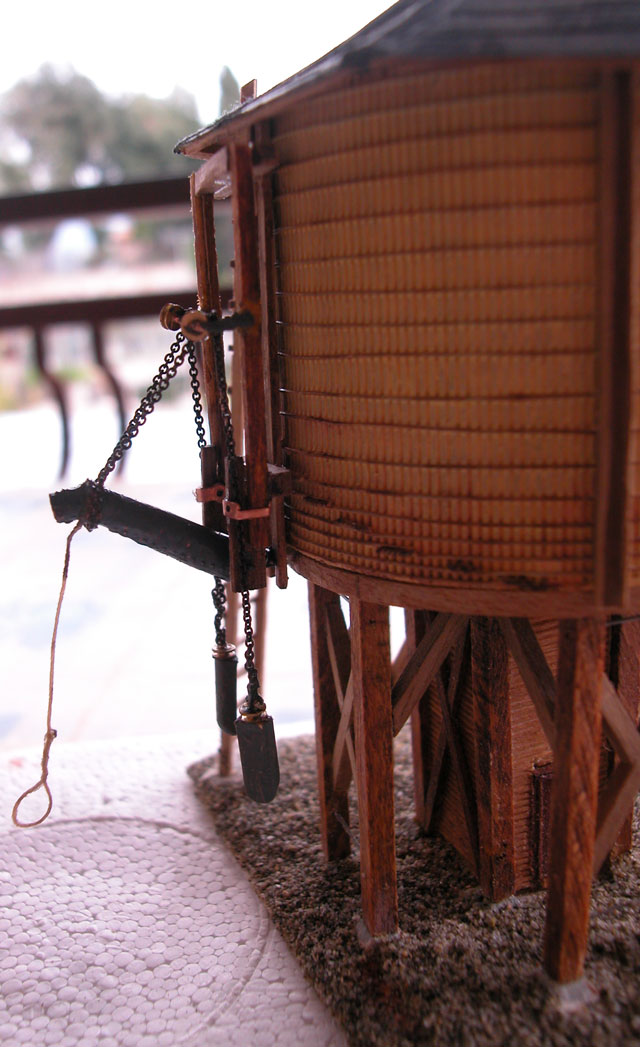
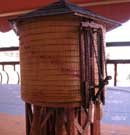
Here a more clear details of the spout frame. Note the way the chain is wired and the final brass counterweigth. Drill a little hole on the spout base to be able to turn down it and install on top the two (brass) little wells. Live the chain free to move if you want to use the spout.
|
 |
 |
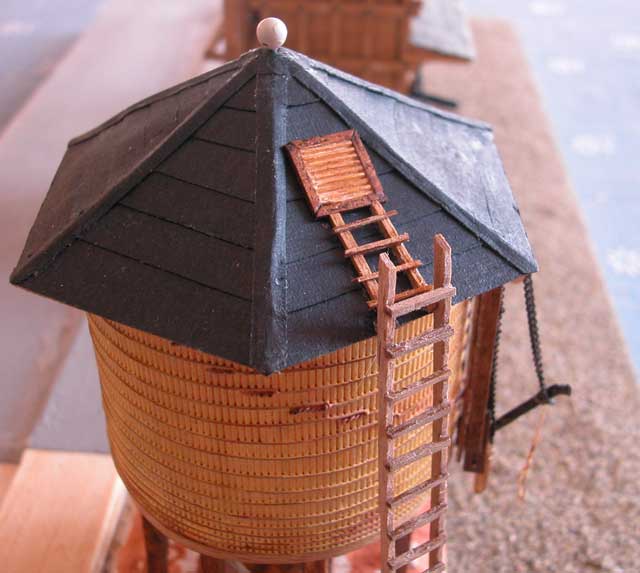
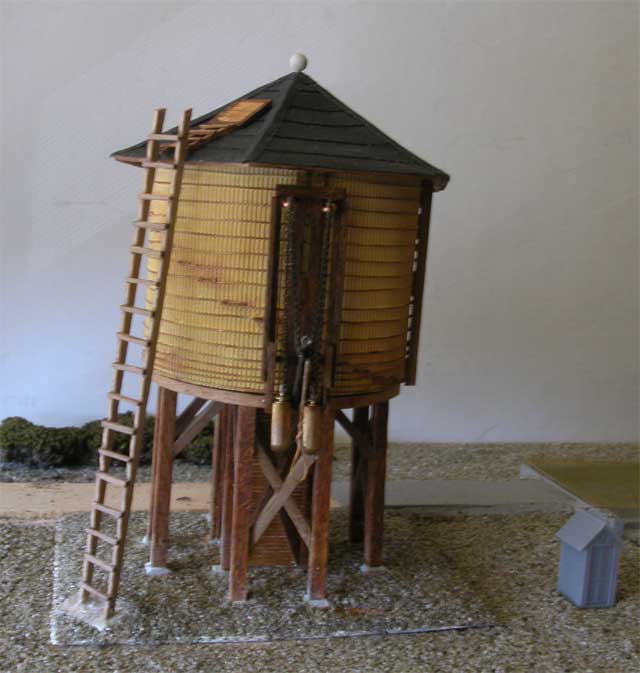
A simple wood stair and a square inspection window ( closed ) give last details on your MASTERPIECE !
What now happens ...... is just SCENERY, but this is another story!
|
 |
 |
 |
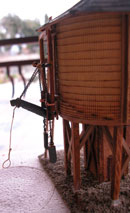
The spout seams wrong to me, so I've remake it using a sheet of brass around a well shaped piece of wood. Adding a rivet row, painting and a rewiew on the supporting weels, give me a "manually operating" spout.
Now my little peoples can use it! |
 |
|