
By jamesvalue
Metallic Text
thanks to Miss B to JimL to Juli to Fred for their languages corrections !
If you feel unfamiliar with terms like color palette , layers palette , tools toolbar , tool options menu , please visit this page.
Download the script for this tutorial HERE!
(only for psp8 owners).
To download the script , just right click on it and choose "save target
as"(if you have a Microsoft O.S. and Browser), now rename the script from
MetallicText.txt , to MetallicText.PspScript , then browse for the "script
trusted" directory created by Paint shop pro 8 , and save the script into
it.
 Here's
the final image , 80% of its original size.
Here's
the final image , 80% of its original size.
Open a new 600X300 px , transparent , 24bit of color
depth , image.
Pick the "text tool" and type some
text on the canvas.
Mine was:
text=307(it should look like a car number)
dimension=200px
bolded=Yes
color=medium gray=RGB 128,128,128.
Font type=Arial
create as a vector and antialias both checked
Psp automatically creates a new "vector layer" for the text.
Now launch the command
Since you can't apply any effects to a vector text, you will have to convert the text layer to a raster layer.
To do this , just use the layer menu: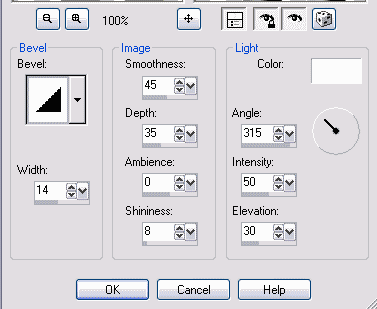 using
the same tweaking of the image beside
using
the same tweaking of the image beside
Now we apply an adjustment curve to give a metallic appearance to the text:
Adjust>brightness and contrast>curves
(P stays for "Point")
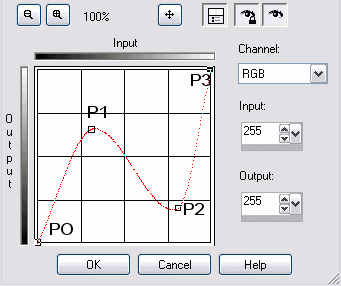 Or you can of course copy the curve directly from the image.
We now colorize the text giving it a "bluish like" color.
Adjust>Hue and Saturation>Hue Saturation Lightness You
can of course copy from the image
You
can of course copy from the image
Time for shadow!
Effects>3d effects>drop shadow
 Using the settings of the image
Finished!
If you want to add a background just continue to follow this tutorial , here is my job:
1 - In the layer palette switch to the first layer (layer1 among two layers). copying
the tweaking from the image beside.
copying
the tweaking from the image beside.
Web site dedicated to Paint shop pro8
|
 |
This site uses tons of "png" images. If you have trouble viewing them an upgrade to a newer browser version should correct those problems (by JimL)
|