DOUBLE CIRCLES IN MADNESS
For the french version of this tutorial, click the flag : 
If you want to see an example of scrippy created with the technique indicated in this tutoriel, that is with 2 circles, click
HERE.
If you want to see the same scrippy but with a single circle, click HERE.
PREPARATION OF THE MATERIAL
Prepare in Paint Shop Pro, 2 elements gifs of base by following the following method:
1) Open in PSP a new file of 300 by 300 pixels, transparent background.
2) Click the tool selection, positioned in the center of ( on) circle and go for the centre (; 150: you will see disentangling figures below to the left of your software go for 150X150. Draw a circle which almost covers all the square.
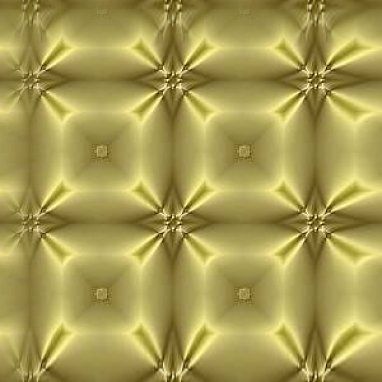
3) Open a tile of your choice. I chose one of my golden tiles
Copy it in the selection.
4) Selection / modify / contract and put 6.
5) Click the touch CANC.
6) Selection: none
7) Duplicate obtained image and with this new image, make Image / resize and put 250 in width and in height.
8) Copy this new image and paste as new image in the square of 300 by 300.
9) Merge visible; select a colour of the outline which you will put as background colour and save as gif optimized. You so obtained your file of 300 by 300 pixels transparent bottom with 2 gilded circles the one inside the other one.
10) Made simply Image / resize and put 100 in height and in width and make copy/paste as new image. Save as gif optimized: you will have so a file gif transparent bottom with 2 gold-coloured circles, but of 100 by 100 pixels.
Instead of using a tile to fill circles, you can, if you prefer, to use a colour either a gradation.
WITH SCRIPPY
1) Open in the Scrippy software a new file: File / New either click the corresponding icon. Insert a background: Insert / background and select a colour of your choice (mark Uses the selected color) which harmonizes with the rest and which will be of use of bottom to the set. In my case, I chose the following colour: #000000 ( The black) so that circles are better put in evidence.
2) Insert / Positioned container. It is the container which will contain the most important motive and the file gif central. In the first column of the window which opens: in Horizontal Layout: Set Position and Widht, From Center: 0; Specified size: 300 (it is the width of the first file gif builds before in Paint Shop Pro).
In Vertical layout, put From Top: 50 and in Specified Size: the height of your image gif (in my case, 300).
Compartments 3 - 7 will all depend of this positioned container and should be one on the other in parallel.
3) Insert / Positioned Image and go for your file gif full of life: In my case, I chose this one:
Mark compartments Centre in horizontal and in vertical: in 2 cases one has to have 0 as value.
4) Insert / background: click Browse to select your file gif with the 2 circles of 300 by 300 pixels.
Put Scrolling: Down; Pixels per the Second: 40; Pixels per move: 1. Fast Scroll: marked.
In Advanced options mark Layer with other objects (in this way the file gif full of life will be contained with this element).
5) Copy and paste the compartment 4 and in scrolling, choose Up.
6) Copy and paste again the compartment 4 and in scrolling choose Left. Shoot in Advanced options Layer with other objects (in this way the element will be behind the file fig full of life).
7) Copy and paste again the compartment 4 and in scrolling choose Right. Shoot in Advanced options Layer with other objects (in this way the element will be behind the file fig full of life).
Main motive is ended. Click Preview to show it. As you can note, 2 elements pass behind the file gif full of life and 2 elements walk past.
Now we can build the other motives on edges.
8) Insert / Positioned container. It is the container which will contain motive at the top to the left. In the first column of the window which opens: in Horizontal Layout: Set Position and Widht, From Left: 20; Specified size: 100 (it is the width of the second file gif builds before in Paint Shop Pro).
In Vertical layout, put From Top: 20 and in Specified Size: the height of your image gif (in my case, 100).
Compartments 9 - 12 will all depend of this positioned container and should be one on the other in parallel.
9) Insert / background: click Browse to select your file gif with the 2 circles of 100 by 100 pixels.
Put Scrolling: Down; Pixels per the Second: 40; Pixels per move: 1. Fast Scroll: marked.
Do not touch anything in Advanced options.
Ne touchez rien dans Advanced options.
10) Copy and paste the compartment 9 and in scrolling, choose Up.
11) Copy and paste again the compartment 9 and in scrolling choose Left.
12) Copy and paste again the compartment 9 and in scrolling choose Right.
The first small square with effect at the top to the left is completed. Click Preview to see it.
Now we can build quickly the 5 other small squares with effect.
13 - 17) click the compartment 8 and make Edit / copy positioned container. Take place then on the last compartment of the list and click the icon Paste. Then move the compartment 13 towards the left.
In the compartment 13, change only a thing: mark Right in Horizontal Layout.
18 - 22) Repeat the previous operation, and now in the compartment 18, mark Right and Bottom.
23 - 27) Repeat the previous operation, and now in the compartment 23, you should put from Right: 20 and in Vertical layout: from Center: 0.
28 - 32) Repeat the previous operation, and now in the compartment 28, you should put from Left: 20 and in Vertical layout: from Center: 0.
33 - 37) Repeat the previous operation, and now in the compartment 23, you should put from Left: 20 and in Vertical layout: from Bottom: 20.
38) Area Insert / message and put this compartment to the left.
We are going to calculate distances to put the message between various effects and so that the scrippy adapts itself according to the length the wrote message. Here are the good measures of margins according to the measures of the other elements: Left: 130; Right: 130; Pip: 400 (height of the main motive and a little of margin above and next size down); Bottom: 130.
Mark Override Scrollbar color and choose 2 colours in accordance with the other colours of the realization. I put in it a colour of the file gif full of life which I got back with the pipette in Paint Shop Pro.
You can complete by adding a sound ( music), a loading message and a ticker.
Save your realization as file SSC or as file HTML.
******************
This tutoriel was created on April 27, 2003 in the context of the works of the Franco-scrippy, french group - Scrippy, based by Mario Panone.
If you want following information about this group click the logo:
If you want to join this group, click HERE.
Check amusementl!
Lorenza
P.: if you want to write to me to have supplementary information or to suggest advices, click
ICI
.