|
||||||
|
Clicca sulle immagini per ingrandirle Click on images for a larger version
|
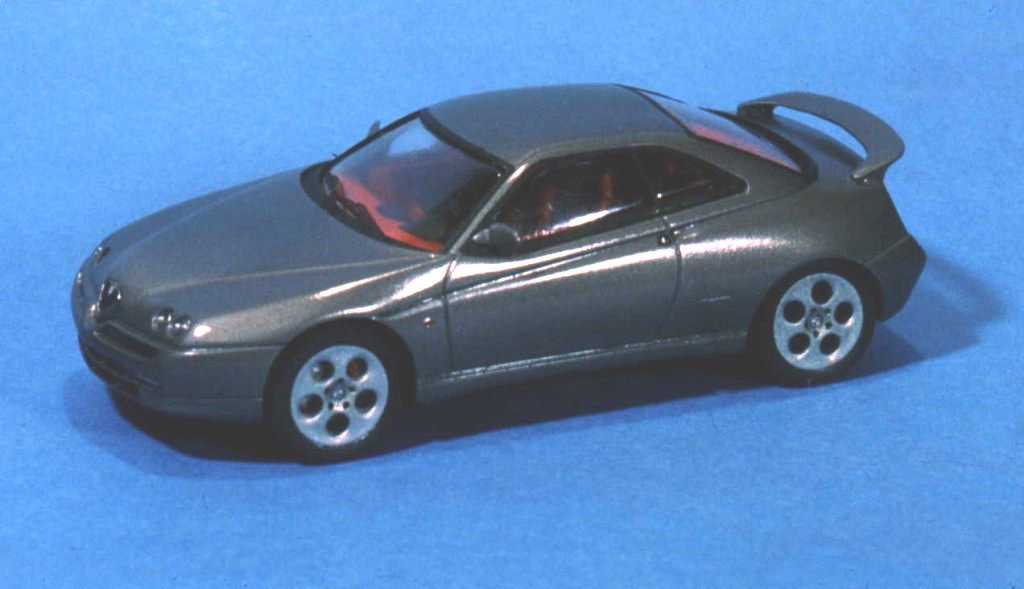
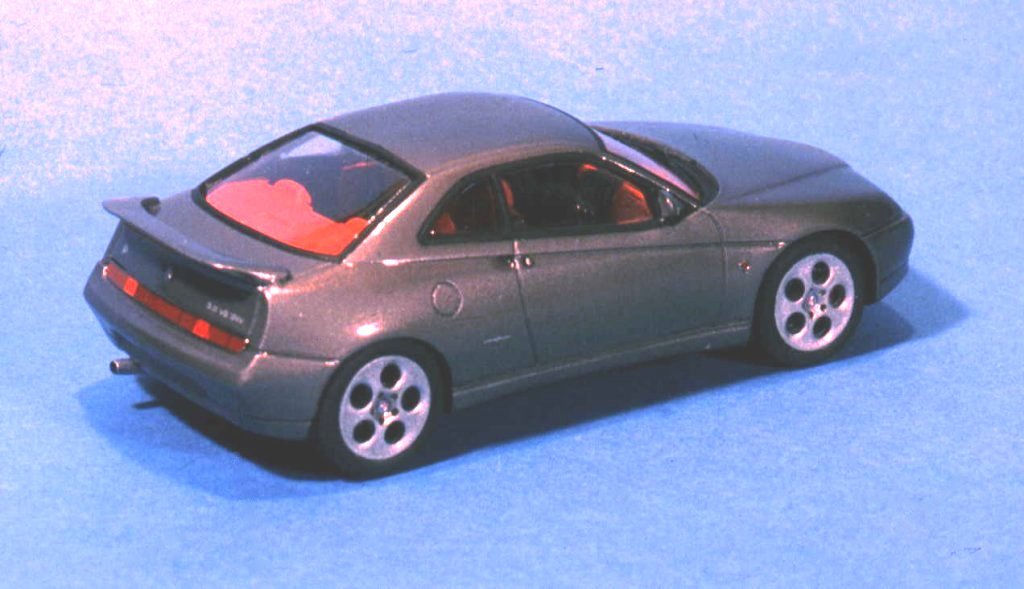
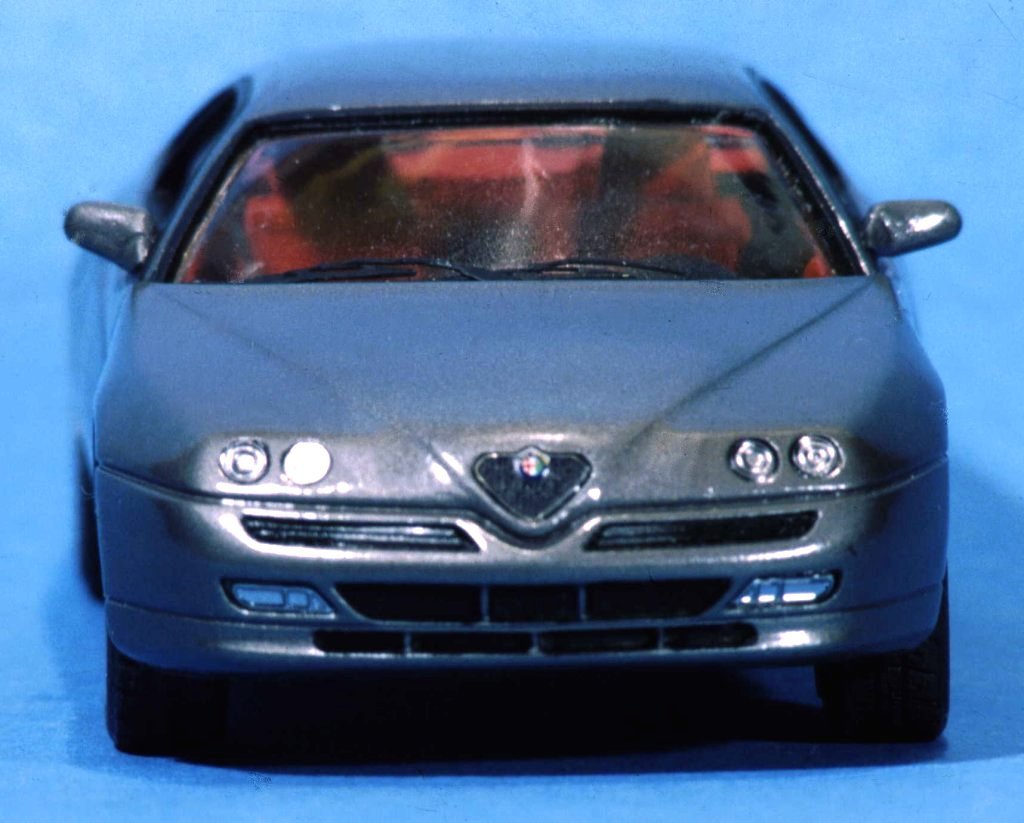
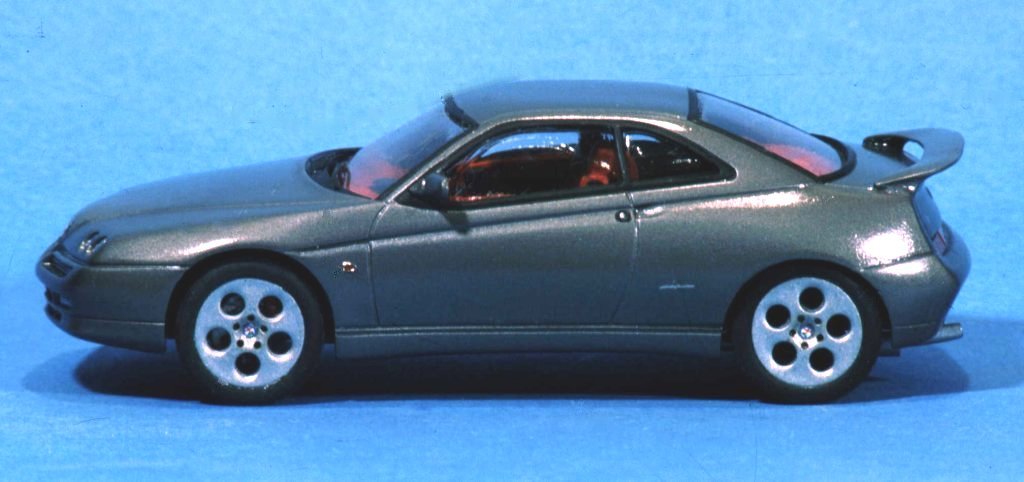
Il modello in questione è della Racing 43. Il kit contiene la carrozzeria, gli interni ed il fondino in metallo, un foglio di fotoincisioni, un foglio di decals e le istruzioni. Questo kit fà parte della serie easy, lanciata dalla casa Piemontese per venire incontro alle esigenze di quei modellisti meno esperti, infatti il fondino e gli interni, stampati in un solo pezzo, sono semplificati, tutto a vantaggio del tempo necessario per il montaggio, senza però sacrificare l’ottima qualità del prodotto finale.Poche le sbavature riscontrate, e ottima la qualità degli elementi in metallo, tranne la carrozzeria. che ho trovato molto ‘porosa’ nella fiancata destra. Ad una verifica effettuata su altre confezioni di GTV della Racing 43, la spider e la GTV Cup, ho potuto constatare che il difetto si presentava solo sulla confezione in mio possesso, mentre le altre erano ok.Il modello che desideravo rappresentare era la versione 2000, quindi ho dovuto pianificare un attento lavoro di dettaglio degli interni, essendo gli stessi quelli della versione 1999. Più precisamente ho dovuto modificare i sedili, il cruscotto, la consolle centrale e ricostruire l’interno delle portiere, che sono nella scatola completamente prive di dettaglio. Per questo ultimo lavoro, mi sono avvaslo, come base di partenza, degli interni portiere presenti nella confezione della Spider, replicandoli in resina e dettagliandoli di tutti i particolari necessari (maniglia, pulsantiera etc. etc.). Ho modificato il cruscotto e la consolle centrale utilizzando stucco Milliput (radio, bocchette condizionamento e pulsanti) e plasticard. Ho dettagliato uno dei sedili con stucco Milliput, rappresentando la trama della pelle, e poi l’ho replicato in resina, aggiungendo a quet’ultimo, i passanti per le cinture di sicurezza. Una volta terminata la fase di ricostruzione e dettaglio, ho montato tutti gli interni, previa prova a secco, e ho steso una mano di primer bianco per uniformare e verificare la bontà delle modifiche. Ho quindi cominciato la fase di decorazione vera e propria, utilizzando i colori acrilici della Vallejo stesi a pennello. Ho riprodotto gli interni in pelle Rossa con dettagli e cruscotto in nero, utilizzando la tecnica che normalmente si usa con i figurini, cioè esaltando le luci e le ombre.Una volta terminati gli interni, sono passato alla carrozzeria. Su questa fondamentale parte del kit, ho dovuto effettuare un delicato e lungo lavoro di stuccaggio per rimediare alla porosità della fiancata destra. Ho usato per questo lavoro, l’ottimo (per il sottoscritto) stucco monocomponente della Molak, molto simile a quello Tamiya, steso a più riprese per evitare il classico problema del ritiro durante l’asciugatura. Una volta carteggiato con diverse grane di carta abrasiva, dalla più grossa alla più fine, ho steso una mano di primer bianco e ho verificato che tutte le stuccature fossero perfettamente levigate. A questo punto ho preparato il colore definitivo. Ho scelto il colore ‘canna di fucile’ della Testor della serie Metalizer, cha ha un’ottima resa, è già diluito per l’aerografo ed una volta asciutto si può ‘lucidare’ usando un panno morbido. Ho steso 3 mani leggerissime, aspettando che fosse perfettamente asciutta la precedente. Successivamente ho applicato le decals necessarie e sopra a queste un paio di mani di trasparente lucido acrilico, direttamente dalla bomboletta a spray.Al termine ho rifinito la carrozzeria decorando a pennello, con nero opaco, le guarnizioni dei finestrinini, e applicando tutti i particolari fotoincisi, tipo la griglia anteriore, precedentemente preparati e decorati a parte. A questo punto ho rifilato i vetri, che nella confezione sono stampati in vacuform interi e non possono essere applicati direttamente in quanto non permetterebbero la corretta chiusura del modello. Quindi li ho dovuti tagliare a misura ed incollare utilizzando del semplice Vinavil. Infine ho fissato il fondino con gli interni alla carrozzeria ultimata, incollandoli con colla bicomponente, in quanto le due viti fornite nel kit, per unire il fondino alla carrozzeria, sono un pò lunghe e rishierebbero di rovinare il modello. In conclusione un bel modello, riuscito discretamente e che è stato un buon banco di prova per future elaborazioni sulla stessa base. |
The model in issue is of Racing 43. The kit it contains the auto body, the inner ones and they found in metal, of photogravures an instruction and, a sheet sheet decals. This kit fà part of the series easy, launch from the Piemontese house in order to come encounter to the requirements of those less expert modellisti, in fact they found and the inner ones, stamped in a single piece, are simplified, all to advantage of the necessary time for the assembly, without but sacrificing the optimal quality of the product finale.Poche the slobbers found, and optimal the quality of the elements in metal, except the auto body that I have found a lot ' porosa' in the skillful flank. To verification carried out on other confection of GTV of Racing 43, spider and GTV Cup, I have been able to state that defect introduced alone on confection in my possession, while the others were ok.Il model that I wished to represent was version 2000, therefore have had to plan a careful job of detail of the inner ones, being the same those of version 1999. More just I have had to modify the seats, the instrument panel, the central console and to reconstruct the inside of the porter, that they are in the box completely lacking in detail. For this last job, me they are avvaslo, like line of departure, of inner the porter present in the confection of the Spider, replicandoli in resin and dettagliandoli of all the necessary particular (handle, pulsantiera etc. etc.). I have modified the instrument panel and the central console using Milliput stucco (radio, bocchette conditioning and push-buttons) and plasticard. I have detailed one of the seats with Milliput stucco, representing the weft of the skin, and then I have replied it in resin, adding quet' last, passing for the seat belts. Once finished to the phase of reconstruction and detail, I have mounted all the inner ones, previa test to dry, and have spread one hand of primer white man in order to conform and to verify the goodness of the modifications. Therefore I have begun the phase of true and own decoration, using the acrylic colors of the Vallejo spread to paint-brush. I have reproduced inner in Red skin with details and the instrument panel in black, using the technique that normally is used with the little figures, that is exalting the lights and ombre.Una the time finished the inner ones, are passed to the auto body. On this fundamental part of the kit, I have had to carry out a delicate and long job of stuccaggio in order to make up for to the porosity of the skillful flank. I have used for this job, optimal (for the undersigned) the stucco monomember of the Molak, many similar to that Tamiya, spread more resumptions in order to avoid the classic problem of the withdrawal during the drying. Once corresponded with various grains of abrasive paper, from most large to finest, I have spread a hand of primer white man and have verified that all the stuccature perfectly were levigate. For this point I have prepared the color definitive. I have chosen the color ' barrel of fucile' of the Testor of the Metalizer series, cha it has an optimal yield, already is diluted for the airbrush and once dry it can ' lucidare' using a soft cloth. I have spread the 3 lightest hands, waiting for that the previous one was perfectly dry. Subsequently I have applied the decals necessary and over to these a pair of hands of transparent I polish acrylic, directly from the cylinder to spray.Al term I have rifinito the paint-brush auto body decorating, with black opaque, the packings of the finestrinini, and applying to all the particular fotoincisi, type the front grill, previously prepared and decorated for part. To this point I have cropped the glasses, than in the confection they are stamped in vacuform entire and they cannot be applied directly in how much would not allow the corrected closing of the model. Therefore I have had them to cut to measure and glue using of the simple Vinavil. Finally I have fixed found with the inner ones to the completed auto body, incollandoli with bicomponent glue, in how much the two lives supplied in the kit, in order to join they found to the auto body, they are a rishierebbero Pò long and to ruin the model. In conclusion a beautiful model, successful discreetly and that it has been a good test bench for future elaborations on the same base
|
||||