Home |tricks |creating transparency

By jamesvalue

creating transparency

If you feel unfamiliar with terms like color palette , layers palette , tools toolbar , tool options menu , please visit this page.
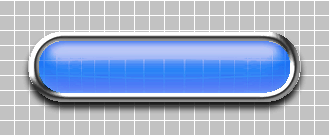
this is the final result


To create transparency beneath a given shape in a 2d graphic program you need to use a little trick .

The trick is to cut out the background standing below the transparent area of the shape, then bring it up at the highest layer , then after some modifications , changing its layer blending mode and/or its layer transparency.


We now begin this tutorial creating a squared background for the button.

Start a new image 330X135 pixel , 24bit/color depth , with a raster and white background
the white backgrund is necessary to this tutorial

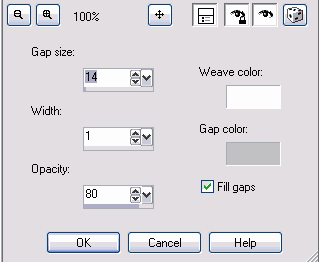
Go to effects>texture effects>weave and apply the settings you see in the image below , to make a squared background the gap gray color must be RGB 192.192.192


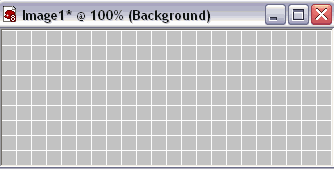
Now you should have a squared grayish image , like in the example


Open your button image (by clicking on the word "button" you should activate the script downloading) , deselect CTRL+D. (for the tutotrial you can go here)


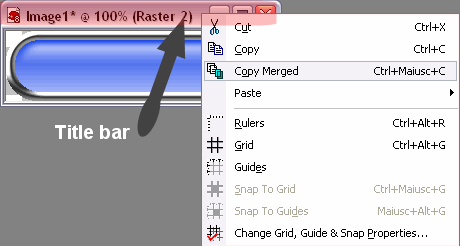
Right click on the "title bar" of the button image and choose copy merged .(this will copy all the visible layers active or not , of the image)
Now go to the other image (the squared one) right click on its title bar and then choose paste>paste as a new layer (this will paste the button as a separate layer inside our image).

Now you can close the button image , we don't need it anymore.


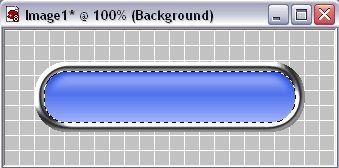
Now we have to select only the glass part of the button , to do this we'll select the entire button , and then we'll reduce the selection by 9 pixels to keep the button frame , outside the selection.

Ensure that raster1 is the active layer (you should check its color on the layer palette) , and pick the magic wand tool , set the match mode for the magic wand tool to "all opaque" , and then click on the button.

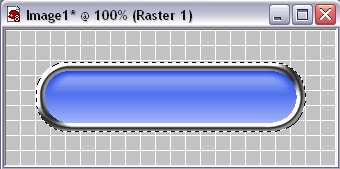
This way you select all the non-trasparent pixels of the layer.

Now we have to remove the frame from the selection , to do this just reduce the selection by 9 pixels.
selections>modify>contract , number of pixels=9

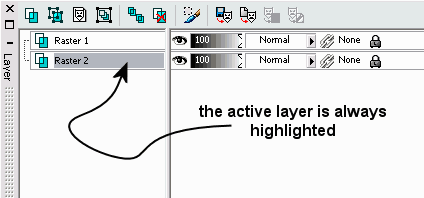
Open the layer palette view>palettes>layer (F8) and analize your drawing.
you have two layers the background layer (that's not a true layer), and a second layer named "raster1", containing your button .
We have to promote the background to a normal layer to do this using the layer palette just right click on the background and select promote background layer.

Now using the layer palette , activate the layer named raster2 (ex-background)


Execute edit>cut this will cut only the selected area of the active layer (raster2 in our case)

We now have to create a new layer , standing on the top of each other layers .
PSP automatically put a new created layer on the top of the active one.
the active one now is raster2 , so if we create a new layer now , the new layer will position between raster1 and raster2 and this is not what we want!

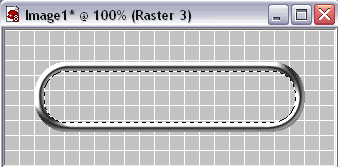
So first activate the layer raster1 then create a new layer (layer>new raster layer) , then paste the clipboard content into the selection edit>paste>paste into selection.

Our glassy button is not disappeared is only positioned in a layer below the raster3 layer , and because of the selection dimension , only the metallic frame is visible.

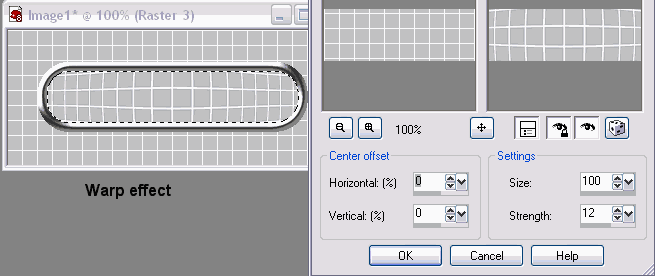
Now we simulate some glass distortion
go to effects>distortion effect>warp


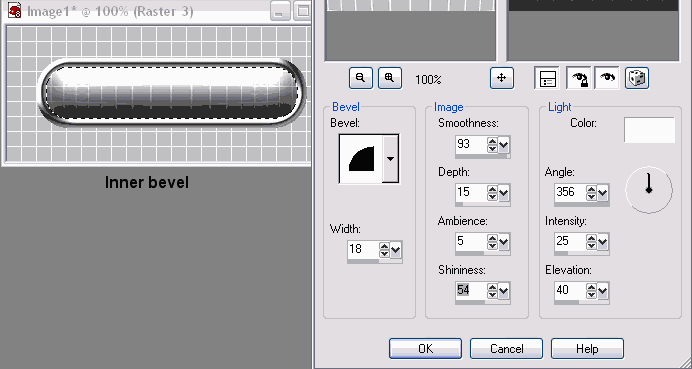
Now we'll give an appropriate shape effects>3d effects>inner bevel


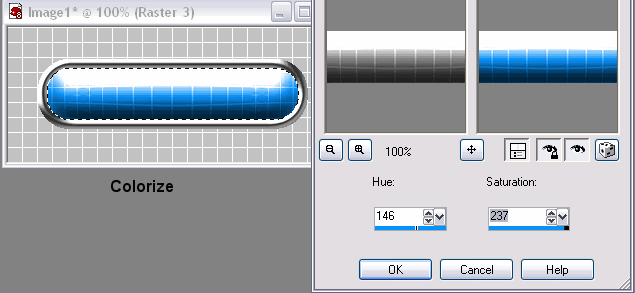
Right color
adjust>brightness and contrast>colorize


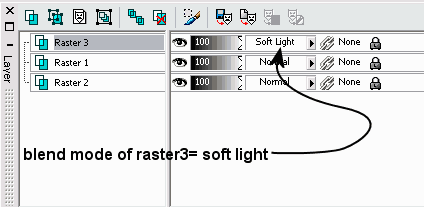
Now using the layer palette , put the blend mode of layer raster3 to "soft light" (feel free to experiment other combination blend mode/opacity) and you're done!


This is the finished button


Home | tricks |creating transparency


Web site dedicated to Paint shop pro8


This site uses tons of "png" images. If you have trouble viewing them an upgrade to a newer browser version should correct those problems (by JimL)