After surfing around the best sites for modders, I decided to build a custom plexy case... Actually
it was quite a difficult experiment because I needed a particular case: I was going to put in a single box two PCs,
including their PSUs, hard drives, optical units, floppy disks and a fast ethernet hub...
Do you think it's really tricky? Nah, it's quite difficult (specially for a novice modder like me) but you'll see it's not
impossible!
First of all I started to draw some sketches placing all the hardware in the box; after a couple of days of heavy
thinking I decided to split the case in three main sections: the leftmost one will house one motherboard, the rightmost
one the other motherboard and the one in the mid will have room for optical units, hard and floppy drives, PSUs and
the hub. I picked up a ruler and a pencil and started to measure accurately all the components; then I was able to
fix the total size of the case and try to place all the devices in the internal space.
As I planned to obtain the finished plexy panels from a local shop with a numeric-controlled ruler, I started to
draw the panels into my preferred CAD program. Just to give you an idea, here you can see the front and the rear
panels (the more complex):


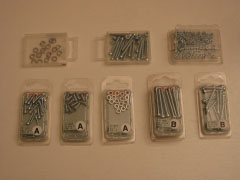
While I was waiting for the panels, I collected all the screws needed to put together the case....
After the cutting was done, I started to put together the optical units: the cage for these drives is also used to fix
the dual P!!! motherboard and will be glued to the bottom plate in order to give strength to the front and back panels.

You can see the standoffs for the motherboard screwed directly into the plexy. The next pictures show the optical cage
glued to the bottom plate and the 10/100 hub fixed in it's place.


The cage for hard and floppy drives was quite simple: a couple of plexy plates were drilled in order to fix all the units.
In my project, this was simply glued to the front panel, but during the making of the case I realised that the whole cage was
too heavy even for the super-glue.... Lesson 1: after measuring two times everything, measure again and try to take into
consideration ANY physical variable!

Then I was so excited to finish this project that I missed to take so many shots; anyway it was just a matter of gluing the
panels together checking all the cutouts I planned. Here you can see the back panel in place (left) and the gluing of side panels (right).


Finally, the front panel was glued.... Here is a shot of the finished (empty) case:

Time to fill the case! For this project I realised a custom three-way fan controller based on the LM317 voltage regulator: with
this circuit it is possible to turn on/off the fans and adjust the speed. The ciruit was drawn in OrCAD Capture, routed with
Layout Plus and cut with a numeric-control machine.


Each channel of the controller handles one vertical "section" of the case and each section has an intake fan on the front and
a blowing-out fan on the back. Here you can see the cooling system set up, the fast ethernet hub and my custom power/reset switches
and power/hd leds.

Here you can see the final result: the leftmost PC is a dual P!!!@1000MHz with 512MB of RAM while the rightmost one is a
P!!!@700MHz with 256MB of RAM.

OK, I know it needs some cable cleaning and some "light effect", but I'm quite satisfied!!! It's my first heavy case mod
and I think it's a good starting point.....
Back to mod page #1


