If you feel unfamiliar with terms like color palette
, layers palette , tools toolbar , tool options menu , please visit thispage.
Download the script for this tutorial HERE!
(only for psp8 owners).
To download the script , just right click on it and choose "save
target as"(if you have a Microsoft O.S. and Browser), now rename the
script from watchstrapJamesV.txt , to watchstrapJamesV.PspScript , then browse
for the "script restrictedted" folder
created by Paint shop pro 8 , and save the script into it.
Download the pspimage HERE!
(only psp8 owners).
To download the pspimage, just right click on it and choose "save target
as" then save it on your Hard Disk , and open it in Psp8.
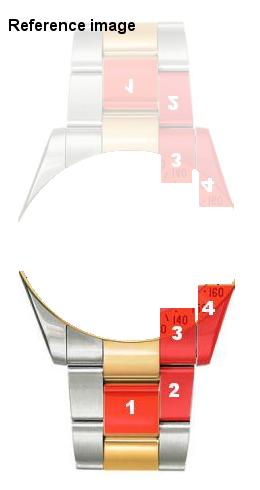
On the left is what you'll get , on the right the reference image you should
use.
Open the reference image in Psp8 we'll use it to build up our watchstrap.
To copy the image in psp this is one way : right click
on the image , save the image on your HD , then open it in Psp.
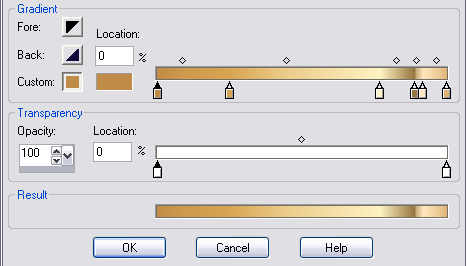
Download or make yourself , these two gradients named : golden1 and chrome1 .
The first one is for the golden part of the watchstrap and the second one is for
the chromed parts of the same watchstrap The
first "golden1" gradient can be downloaded
HERE
The second "chrome1"
gradient can be downloaded HERE
Pick the preset shape tool (P) and in the
tools options set these values: Shape type=rounded rectangle , create as a vector=yes
, retain style=no , outline width=0 , antialias=yes .
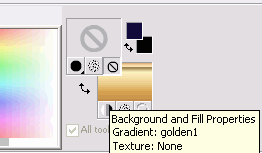
Now set the materials palette
using these tweaks: stroke=none
fill=gradient
gradient name=golden1 texture=none Materials ready
to be applied
Zoom in , in the reference image as close as you need and then draw a rounded
rectangle that roughly resembles the item1in the reference image .
Note - use the layers palette's visibility toggle to
hide or unide the first background layer , this way you can better watch your
progress .
This
is what you should have drawn till now.
Now copy the vector rounded corners rectangles edit>copy
Zoom-in into the image . to have a better positioning and then paste the copied
rounded rectangle as a new vector shape about 2 pixel at the top of the existing
one : edit>paste>paste as a new vector selection
Repeat the pasting process to add a third rounded rectangle , but this time , you'll position
it 2 pixels below from the bottom end of the first one edit>paste>paste as a new vector selection
Now we'll position the three rounded rectangles exactly in the center of the canvas
.
Pick the object selection tool (O) and draw a selection windows area , wider than
the area occupied by the three objects, this will select all and only the objects
inside the window area .
A selection window area
Once the objects are selected , launch this command : objects>align>Horz.
center in canvas
Horizontal center in canvas for trhee objects
Now deselect by clicking on an empty area , then using again the object selector
tool , select only the bottom rounded rectangle , and using the resizing arrows
adjust its height to reach about 1/2 of its original vertical size (use the reference
image to copy the exact height from), then select again all the three rounded rectangles
and group them objects>group The bottom
rectangle has a smaller size
We have to draw the chromed part of the watchstrap , to do so we'll use the pen
tool (V), and we'll draw some vector shapes across our reference image.
Pick the pen tool (V) , then set the options menù for this tool to:
drawing mode=draw
drawing type=point to point draw
antialias=yes
other=defaults
Now set the materials palette: stroke=none
fill=gradient
gradient name=chrome1 texture=none
Materials ready to be applied
Now we have to copy item2 of the reference image , drawing a closed shape whith
the pen tool in a "point to point" fashion.
To draw the closed shape , this is one way:
tick some points on the canvas in a clockwise or counterclockwise order , and
then before to exit the pen tool , drag the points into position to reach item2
shape.
Note - moving the last point into the position where
the starting point actually is , causes the starting and last point , to merge
together , and subsequently to get a closed shape. This is the 4points
closed shape , you should have drawn
Now pick the object selection tool (O) and select the last chromed shape you made
.
Copy it : edit>copy and then paste :
edit>paste>paste as a new vector selection using the positioning central
handle (and of course a large zooming), drag this shape about 2pixels below from
the bottom end of the chromed first shape , and about 2 pixels on the right of
the golden part.
Using the bottom and right handles, adjust its height and its thickness to get
the exact size you need. The watchstrap
start to get into shape.
Now using our reference image , copy item3.
Item3 is nothing but a rectangle , so to draw it just pick the preset shape tool
(P) and set the tool option menù to : shape type=rectangle
, antialias=yes , stroke width=0
activate the visibility toogle=on for the layer where , the reference image is located and just draw a rectangle similar to item3.
Using the appropriate handles , position the shape as precise as you can (2pixels left and bottom) . Third chromed component has been added.
Now we have to draw the last shape.
Last shape is item4 and to draw it we'll use the pen tool (V) to draw a closed
shape as we did before for item2.
So pick the pen tool (V) , and ensure these settings in the tools option menù
and for the pen tool are applied: New shape=yes , drawing type=draw , segment type=point
to point , antialias=yes , other=defaults.
Using the pen tool draw the final shape (item4).
As usual pick the object selection tool (O) and move the shape positioning it
as best as you can , but this time we also have to change the gradient angle through
"shape properties".
Using the object menu , activate the object properties objects>properties
for the vector object you just drawn , a window will open click on the fill box
, the gradient window will open , here you can decide a lot of things about the
gradient.
Set the the gradient angle to 353° to arrange the shape slope .
Gradient angle has been set to 353°.
The watchstrap is basically finished , we only need to organize further our jobs. This is what
you should have till now (the reference image layer has been turned off)
Using the object selection tool (O) drag a selection window wide enough to select
all the chromed components
then group them object>group. Chromed parts
have been grouped.
Now we have to mirror this group but in another layer.
To do so just copy the group edit>copy
then paste it but in another layer , edit>paste>paste
as a new layer
Now mirror the copied group image>mirror
And place this group into position.
Note - The mirror command in Psp applies to all the objects
belonging to the same layer , for this reason if you need to create a mirrored
copy from a single object (or group) first you have to put the object into a different
layer and then create the mirror .
Chromed
group mirrored and placed into position.
The bottom watchstrap is ready , now we need to create a flipped copy of this
shape , to create the top part .
Draw a window to select all the vector objects you have on the canvas and then
create a group objects>group A group has
been created.
Note - Since a so-called "group" is forced
to stay in a single layer , automatically when you create a new group , Psp moves
all the objects belonging to that group into one single layer , so practically
you can delete all the empty layers you got till now , since only one layer is
really necessary.
Now it's time to rasterize the vector shapes you have drawn .
There should be only one vector layer left , containing the bottom part of the
warchstrap .
Using the layer palette
activate this vector layer (just click on it) , then rasterize it : layers>convert
to raster layer .
To create the top part of the strap , we have to create a flipped copy of the
bottom part , but (like before) , we have to flip it on a separate layer.
So launch edit>copy
then edit>paste>paste as a new layer
Execute Image>flip this will create a flipped copy of
the bottom watchstrap.
Position the new raster flipped copy using the "mover" tool .
Note - you can't use the align menu to position your
shape , because the layer you are working on , is a "raster" layer,
and the "align menu" applies only to vectors . The completed
watchstrap.
We have to create a dark background for the watchstrap.
Using the layer palette activate the first bottom layer , named "background"
(that one containing the reference image) and create a new raster layer
layers>new raster layer
Using the layer palette , double click on the layer name and rename it to "darkBg"
.
Pick the flood fill tool (F) , in the tool option menù verify the match
mode=none
In the materials palette set the foreground style to : foreground
style=color , color=dark blue HTML code=#090B21 , texture=none . A dark layer
has added.
From this background we have to remove the pixels located outside the watchstrap
area.
To do so we have first to merge all the layers containing the watchstrap , into
one single layer , then create a selection.
Adjust the selection to suit our needes then use this inverted selection over
the "darkBg" layer.
Merging Layers
Use the layer palette toogle to turn visibility off for every layer you don't
want to merge.
Then execute layers>merge>merge visible
Layers Raster1 and Raster2 are the only visible
This will merge every visible layer into a single layer , named "merged"
.
Double click on it and rename this layer to "watchstrap".
Creating the selection
Pick the magic wand tool and set its tool option menu to :
mode=add (shift) , match mode=all opaque , other=defaults
Click on the canvas , the times you need to select the whole watchstrap. Only
the top part is shown
To use this selection we need before to clean it.
Since from this selection we need only the external shape of the strap , to remove
the unnecessary selections , we can use this way:
just exapand the selection a number of pixels bigger in size than the smallest
selection you have (normally 2pixels wide) , then contract the selection again
, by the same pixel's amount .
selection>modify>expand (by 2 pixel ) selection>modify>contract ( by 6 pixel
this way we'll achieve a more believable selection)
Save to alpha channel selections>load and save selections>save
selection to alpha channel. the selection
you should have
Now using the layer palette activate the layer "darkBg" and toogle its
visibility=on.
Invert the selection selection>invert and
then delete edit>clear. Deselect (ctrl+d).
This is the result
Now we have to draw a false watch to complete our drawing.
The false watch is nothing but a dark blue circle , surrounded by a 10 pixel chromed
edge .
To draw it we'll use a vector shape (ellipse).
Pick the preset shape tool (P) .
In the tool option menu set the shape type=ellipse ,
stroke width=10 , and verify these settings : antialias=yes
, create as a vector=yes , retain style=no .
In the materials palette set the stroke box : style=gradient
, gradient=chrome1 , texture=none .
The fill box : fill=color , color=dark blue (HTML code=#000138)
, texture=none.
Activate the highest layer in the material palette (the "watchstrap" layer) ,
this will create the new shape just on top of each other layer.
Using the shift key to constrain the ellipse to a circle , draw a vector circle
on the canvas .
Center it objects>align>center in canvas.
Use the adjustament handles to adjust its dimensions (last operation should always
be the centering in canvas)
The false watch has been created.
we now create a drop shadow .
To do so we need to have the entire watch shape available .
So first of all we have to merge into one single layer all the layers we made
till now (except for the first "background" one ).
To do so we'll use the layer palette and toogle visibilty off for every layer
we don't want to merge (in this case only the first one) , and we execute layers>merge>merge
visible. Layers have
been merged
Double click on the layer name (merged) and rename it to "watch".
Creating the drop shadow
launch effects>3d effects>drop shadow and
use the below image settings
A new layer is created for the shadow
Now we create a light background for the watch.
To do so we need a new gradiente as usual you can download the gradient HERE
or you can make it by yourself using these tweaks: name=lightSky
, color1=blue light , color2=white.
Note - if you need a cloudy background like that one
I made for the first image , you can download for FREE these effects named Mura's filter(I used the cloud2.2 filter)
Create a new layer for the light background layers>new
raster layer . name it "lightBg" and using the layer palette
, position it as the second one , just on top of the first one (the background
layer)
Pick the flood fill tool (F) , using the tool options menu set its match mode=none.
Set the materials palette to : foreground style=gradient
, gradient type=lightSky (the last we prepared) , texture=none , background style=none.
Click on the canvas and you're done! The finished
watch.
Home | Tutorials|part1
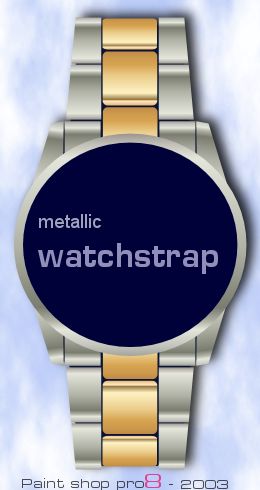
metallic watchstrap one-page
Web site dedicated to Paint shop pro8
This site uses tons of "png" images. If you have trouble viewing
them an upgrade to a newer browser version should correct those problems
(by JimL)

 The
first "golden1" gradient can be downloaded
HERE
The
first "golden1" gradient can be downloaded
HERE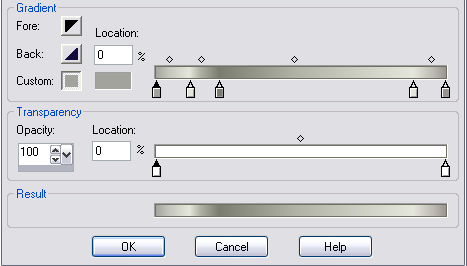 The second "chrome1"
gradient can be downloaded HERE
The second "chrome1"
gradient can be downloaded HERE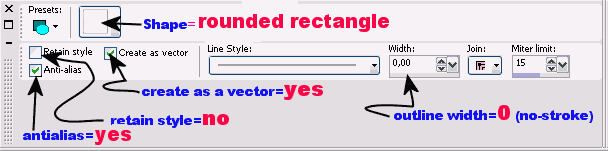
 Materials ready
to be applied
Materials ready
to be applied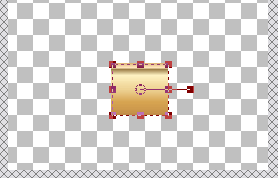 This
is what you should have drawn till now.
This
is what you should have drawn till now.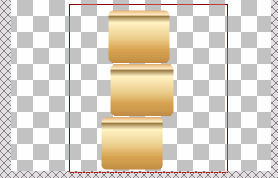 A selection window area
 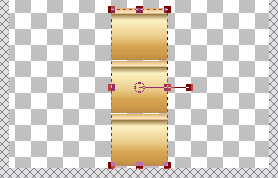 Horizontal center in canvas for trhee objects
 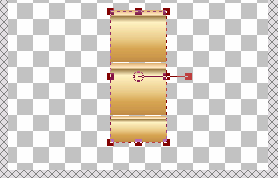 The bottom
rectangle has a smaller size
The bottom
rectangle has a smaller size

 Materials ready to be applied
 This is the 4points
closed shape , you should have drawn
This is the 4points
closed shape , you should have drawn  The watchstrap
start to get into shape.
The watchstrap
start to get into shape. 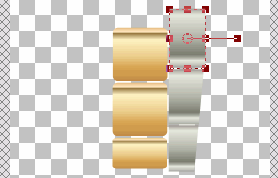 Third chromed component has been added.
 Gradient angle has been set to 353°.
 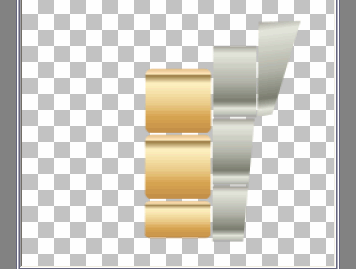 This is what
you should have till now (the reference image layer has been turned off)
This is what
you should have till now (the reference image layer has been turned off)
 Chromed parts
have been grouped.
Chromed parts
have been grouped. 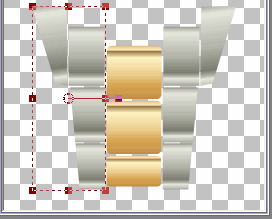 Chromed
group mirrored and placed into position.
Chromed
group mirrored and placed into position.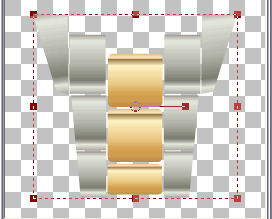 A group has
been created.
A group has
been created.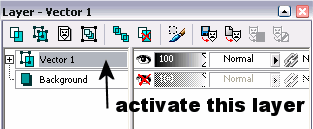

 The completed
watchstrap.
The completed
watchstrap. A dark layer
has added.
A dark layer
has added.  Layers Raster1 and Raster2 are the only visible
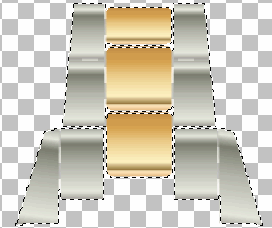 Only
the top part is shown
Only
the top part is shown  the selection
you should have
the selection
you should have  This is the result
  The false watch has been created.
  Layers have
been merged
Layers have
been merged 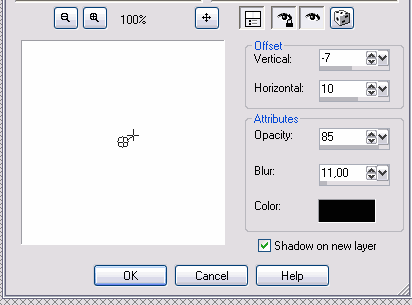 A new layer is created for the shadow
 The finished
watch.
The finished
watch.